The Macintosh Guy || MacTips || Email Lists || My Blog
Tip #19, Gettin' Around.
One of the benefits of the Mac is that it likes to do things they way you like to do things. I know it sounds like a commercial jingle, but it is true. For most every task there are a number of options for how to accomplish it.
This weeks MacTip covers some basic and not so basic ways of getting around the Finder. Although much of this may be what you already know, I hope you will find a thing or two that will help you be more productive in navigating your Mac.
Getting from here to there. Most of the time when I'm going after something on my hard drive, I know exactly how to get there without having to see a single window. However until Apple comes up with a way to take us to the item we're thinking about, we'll still have to dig through the folders to get there.
Let's talk about the number of ways to get to a certain folder. Say, for example, I wanted to get to my Claris Emailer, Downloads folder. The path to get to it is "On the road... (the name of my hard drive), Applications folder, Net-Com folder, Claris Emailer Folder, Downloads. Using conventional methods there are basically three ways to get to the items that are in that folder.
All mouse-This would be the way that you learned going through the Macintosh Basics when you first got your Mac. Double click on your hard drive, then each folder till you see the item you want.
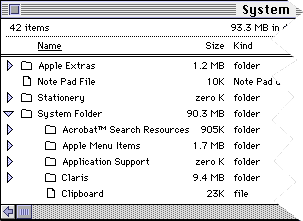
 Selection triangles-This is the way that I use the least but many people love it. In a list view (Select 'By Name' from the 'View' menu) and simply click the little triangles that are to the left of each folder till you find the item you want. Personally I like to keep things compartmentalized and opening all those folders in that same folder seems like it gets things too messy for me. For those of you who like to work this way please be kind to those of us who don't, when you open folders up on a server put them back the way you found them. I often go into a folder that should have only a few items in it and find this huge mass of files because someone left all those little triangles pointed down. "Be kind, untwist!"
Letters and arrows-This is the way that I use most often when I know exactly where I'm headed. I like to combine the ability to type the first few letters of each item or folder with the ability to hold the command key (the one on either side of the space bar for those with full size keyboards, or the one with the 'Open Apple' for those with Apple II roots) and down arrows to go down into a folder or the up arrow to go to the level above the folder selected.
Generally I start from the desktop and type the first couple letters of my hard drive till it becomes selected, the a command-down arrow opens it up for me. Then I begin to type the name of the folder I want to open next "Applications", A-P-P does the trick, then this time I hold down both the option and command keys and press the down arrow. Anytime you are opening a folder, application, or a document, adding the option key will close the window behind you. While my applications folder is opening, I'm already working in the next thing, I know my Claris Emailer folder starts with C-L-A, so I type it and do another command option-down arrow. I continue in this manner till I get to the item I want.
The key to this way of navigating your hard drive is that even if you have a slower system, you don't have to wait for each window to open before giving it the command for the next window you want to open. It can be fun to race your hard drive to see if you can type the directions to a folder before it can actually get there. On my Classic and Duo, no problem. But on a machine with a fast hard drive it can be a challenge.
Another option besides using the first few letters of an item to select it is the 'Tab' key. Pressing the 'Tab' key will take you through the items in a folder alphabetically. Holding the 'Shift' key while tabbing will take you in reverse alphabetical order, give it a try.
The arrow keys are your friends. For those of you who have been brave enough to venture away from the comfort of your mouse to go to the keyboard have had the need, here and there to go back to the mouse for a one or two clicks on occasion. Perhaps I can save you a click or two. There are three "key" places that the arrow keys can be used.
The first is in the way mentioned above with using the up and down arrows in combination with the command keys to open a folder at the level below the current one or to the folder in the level above the one you are at.
The second place in which the arrow keys come in real handy are to twist and untwist those little triangles when you are in a list view. If you switch your view to a list view (Choose by name, size, kind or date, from the view menu) and select the folder you want to open, simply holding down the Command key and pressing the right arrow will twist that little arrow down for you and reveal what is inside. In the same fashion holding the command key and pressing the right arrow will hide everything in that folder. Also, if you happen to get in the unfortunate situation of coming to a folder that has all the little triangles open and having to wait and wait for all the items to draw on the screen selecting an open folder in the list and holding down both the command and option keys and pressing the left arrow will close all the folders contained in that folder.
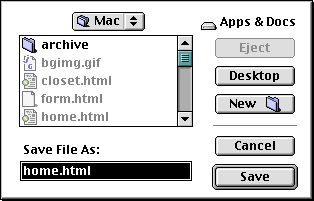
 The third place in which the arrow keys are useful are in the standard file dialog. This is the one that comes up every time you save a file or select the open command in an application. This is the place where the arrow keys really shine. Here, just like in the first example you can use the up and down arrows to go down into or up out of the folders you may select in that dialog. Go ahead and try it, select 'Open...' from the 'File' Menu in your web browser. Click on a folder and use the up and down arrows to navigate up and down through the folders of your hard drive.
The other way to use the arrow keys in the standard file dialog is to move between the mounted volumes available. A volume is anything that can contain files, a hard drive, floppy, network drive, zip cartridge, etc. (If you don't have more than one volume go ahead and put a floppy in so you can try this.) Holding down the command key once again, use the left and right arrows to move between the mounted volumes. This will let you scroll through disks, hard drive volumes, network servers, and any other volumes that are currently mounted on your desktop.
Using the Finder can be a 'drag'. Well, OK, not really, I think it's great (and getting better all the time). I thought I'd mention a couple quick comments on dragging. Dragging in the Finder means either moving or copying. Just doing a normal drag in the Finder will move a file or folder dragged somewhere in the same volume and will copy those files if dragged to a separate volume. Want to copy a file or folder within the same volume? Simply holding the option key prior to starting the drag will copy the dragged item to the new location. And the burning question if there is a way to move files between volumes? Sorry, no secret key command. Just copy the items and delete the originals.
Have you ever started dragging an item and realized you didn't want to drag it but can't put it back? Just drop it on the menu bar it the top of the screen and it will go back where it came from.
 Let's clean things up a bit. As I'm sure you know it can be easy to get files folders and windows scattered all over your desktop. Here's a few tips for cleaning house.
'Put Away'. One of the little known menu commands is the 'Put Away' command in the 'File' menu. Wouldn't it be great if everything in life had a command like this one? 'Put Away' does exactly what it sounds like. Ever put something in the trash and want it back where it was? 'Put Away' is the command for you. Don't like the idea of dragging you CDs or floppies to the trash? Just put them away instead. 'Put Away' will eject them and remove them from the desktop just like dragging them to the trash. The 'Put Away' command will also put an item dragged onto the desktop back in its place even if you don't remember where it came from.
 'Close All'. I don't know about you, but I sometimes get in the habit of leaving many windows open. I'm sure we all use command-W to close a window here and there but simply adding the option key to that will close all the windows open on your desktop. Notice that in 7.5.3 and later the windows close from back to front for maximum window closing performance.
'Clean up by Name'. Another of my favorite option-key commands are the 'Clean up by..." commands. Sure we all know about the 'Clean Up Window' option from the 'File' menu, but when you are icon view (choose 'by Icon' from the 'View' menu) holding down the 'option' key will change 'Clean Up Window' into 'Clean Up By Name' or clean up by whatever the last list type view that window was in.
Although this weeks MacTip was a little less technical than usual but it covers some basic ways of navigating the Finder. This information is important both for laying a good foundation for using the Finder and will also help in adjusting to the changes that Mac OS 8 will bring. I'd love to hear if you found out anything new about the Finder or if you have any favorite commands that I left out.
The Macintosh Guy || MacTips || Email Lists || My Blog